
This article demonstrates how to use modal windows in Django with jQuery UI.
Although jQuery was once indispensable for web development with Django, it has rapidly declined in popularity with the rise of various front-end frameworks. However, when using Django's default templating engine for front-end development, jQuery still offers a simple and straightforward way to solve certain problems without added complexity. In fact, numerous tutorials combining Django and jQuery still exist online, and many remain practical and useful. For many Django developers, jQuery remains a valued option for its simplicity.
JQueryUI
jQuery has a long history with UI components, most notably through jQuery UI. While some newer developers might dismiss jQuery UI as outdated, it remains functional and well-documented. Moreover, it integrates seamlessly with Django templates as a UI component library.
jQuery UI is one of the simplest options for implementing modal windows in a Django front-end.
Application specifications
Backend- Django
Frondend- Django's default template, jquery, and jqueryUI.
AJAX is used for communication between the front-end and back-end.
A Note on Terminology
Note that jQueryUI uses the term "dialog," but "modal" is a more common term, so we will use it throughout this article.
Project Overview
The following image illustrates how this application works.
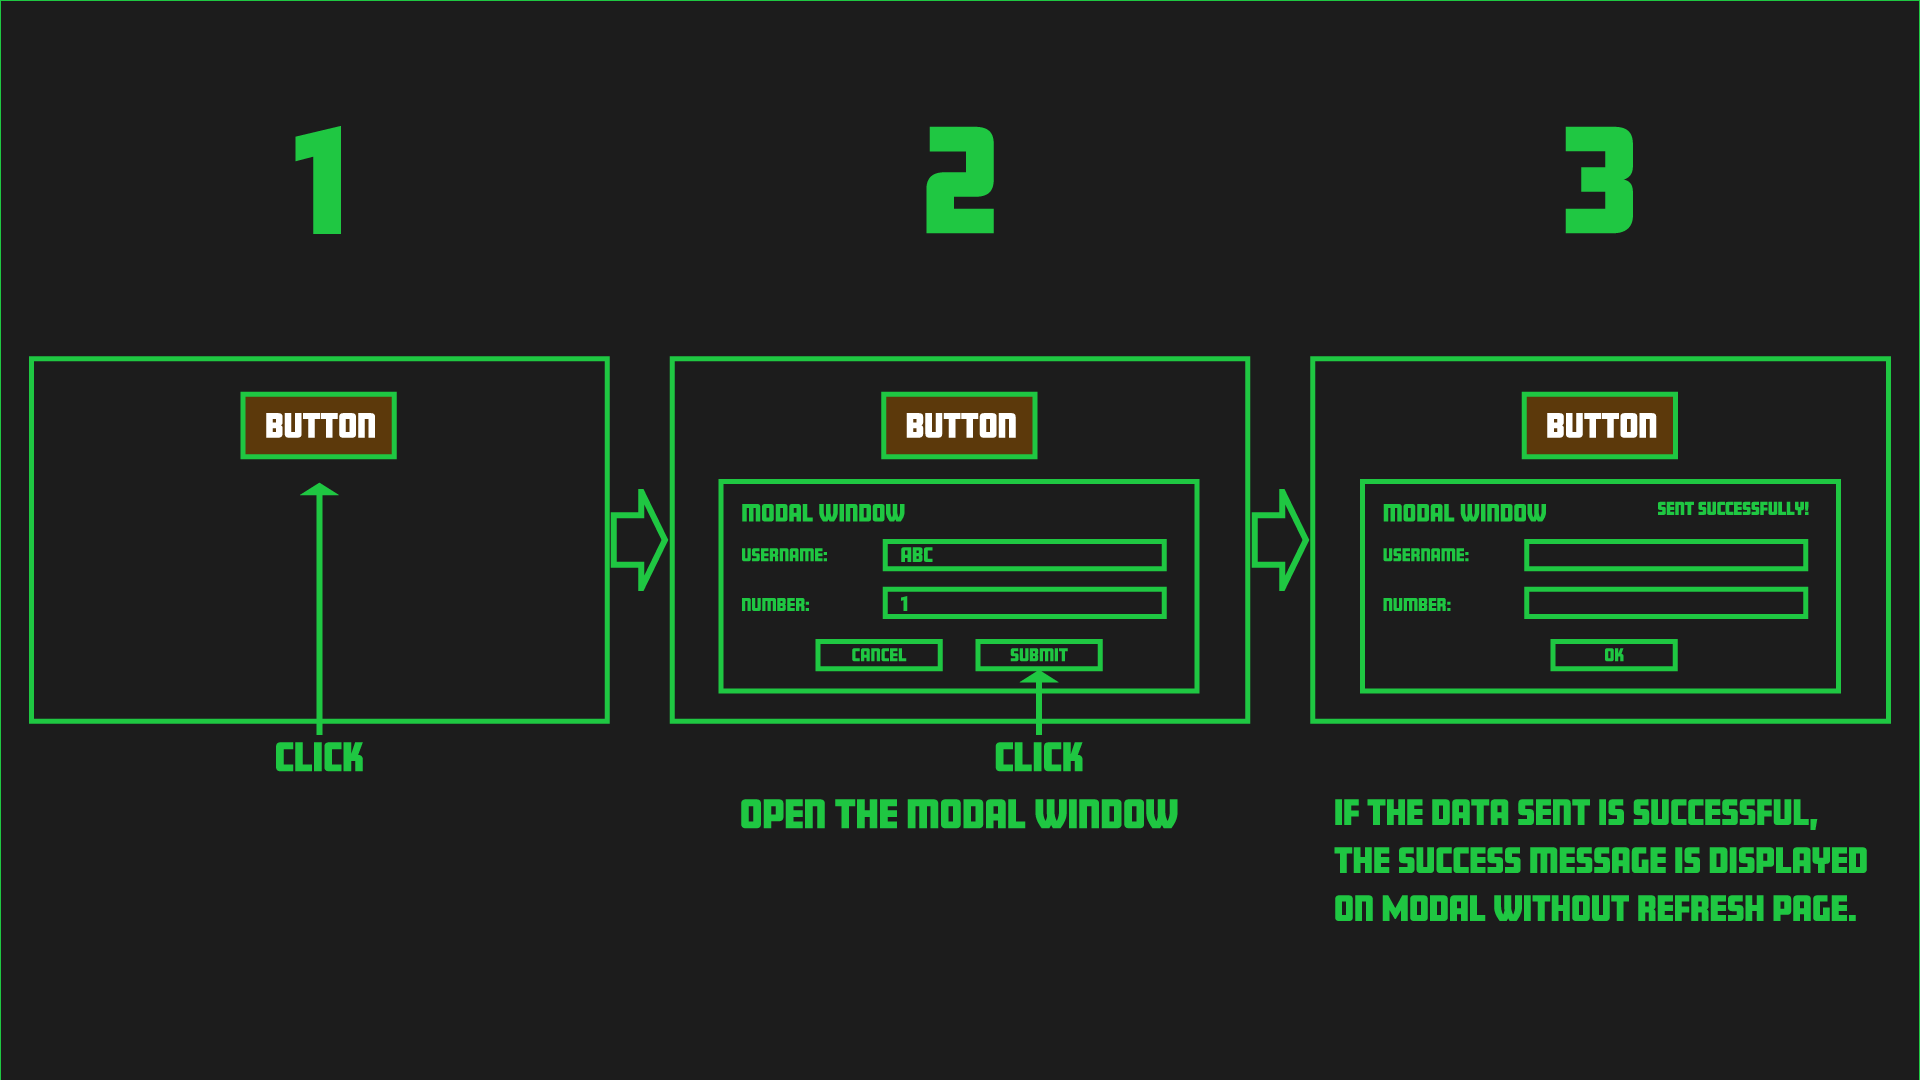
Click the button to display the modal. The modal contains a form where you can enter data. When you submit the form, it will initiate an AJAX request that validates the data and stores it in the database. If the data is successfully saved, the modal will display the message "Sent successfully!"
To apply Django's MVT pattern to the data exchanges in steps 2 and 3, this can be represented as follows:

Django Development Environment
I won't cover the basic Django configuration, as it's covered extensively in other tutorials.
Additionally, please refer to this article for information on setting up Django with Docker.
If you follow this tutorial based on my article (Basic setup for running Django with Docker), pause at the step where you create a new application using the startapp command (Section 8).
Install Django Packages
The following packages are currently installed in Django.
requirements.txt
psycopg2-binary
django-environ
django-widget-tweaks
Development Process
- Creating a New Application
- Define a model in
models.py - Register the Defined Model in
admin.py - Creating a Template
- Creating
forms.py - Creating a basic
views.py - Adding new application to
urls.pyof Project - Adding a View to
urls.pyon the Application - Adding Basic jQueryUI Code to the Template
- Implement AJAX to enable data communication between the view and the jQueryUI component
- Applying Data Validation Within the View
- Displaying a Success Message upon Successful Data Storage
1. Creating a New Application
To create a new application, enter the command as shown in the accompanying box from the command line (or, if you are using Docker, enter the command from the Docker side):
python manage.py startapp app
After creating the new application, add this application to settings.py.
settings.py
INSTALLED_APPS = [
    ...
    'widget_tweaks',
    'app.apps.AppConfig'
]
Additionally, don't forget to add 'widget_tweaks' as we are using Django widget_tweaks.
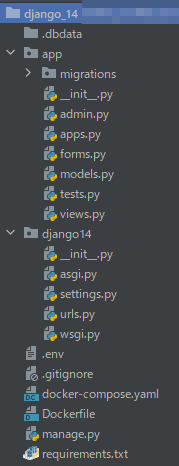
At this point, your file structure should look like this:
Since I am using Docker, my file structure includes Docker-related files.
If you're not using Docker, your file structure will differ slightly.
2. Define a model in models.py
Let's create our model. The model for this app is simple; we'll just add a username and a number.
from django.db import models

class Number(models.Model):
    username = models.CharField(max_length=10, blank=False, null=True)
    number = models.PositiveIntegerField(blank=False, null=True)

    def __str__(self):
        return self.username
Once this is complete, create a database table by entering the command as shown in the accompanying box.
python manage.py makemigration
python manage.py migrate
3. Register the Defined Model in admin.py
To register the model created above, add it to the admin.py file.
from django.contrib import admin
from .models import Number

class ModalAdmin(admin.ModelAdmin):
    list_display = ('username', 'number')

admin.site.register(Number, ModalAdmin)
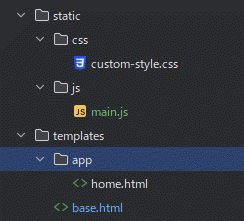
4. Creating a Template and static folders
Create the necessary parts of the template and static folders. The structure of these folders should be as follows:
Inside the static folder, we'll create main.js, which will contain our Ajax code. This is the key part of this implementation. To send form data using Ajax, we need to include Django template tags within our JavaScript. However, embedding Django template tags directly in a .js file will cause errors. To avoid this, we'll use a technique in our base.html, which we'll discuss next.
Also, a small but important detail: don't forget to add the following static files path setting under STATIC_URL in your settings.py.
settings.py
STATICFILES_DIRS = [
    os.path.join(BASE_DIR, "static"),
]
Now, let's create base.py. Add jQuery and jQueryUI, main.js and custom-style.css mentioned above.
Also, take note of the line <script src="{% static 'js/main.js' %}"></script>. We'll write the corresponding views.py and urls.py for app:form_test later, but in main.js, we'll pre-store data in a variable before including it in our Ajax call, as shown below.
base.html
{% load static %}
<!doctype html>
<html lang="en">
<head>
    <meta charset="UTF-8">
    <meta name="viewport"
          content="width=device-width, user-scalable=no, initial-scale=1.0, maximum-scale=1.0, minimum-scale=1.0">
    <meta http-equiv="X-UA-Compatible" content="ie=edge">
        <link rel="stylesheet" href="{% static 'css/custom-style.css' %}">
        <link rel="stylesheet" href="https://cdnjs.cloudflare.com/ajax/libs/jqueryui/1.12.1/jquery-ui.min.css" integrity="sha512-aOG0c6nPNzGk+5zjwyJaoRUgCdOrfSDhmMID2u4+OIslr0GjpLKo7Xm0Ao3xmpM4T8AmIouRkqwj1nrdVsLKEQ==" crossorigin="anonymous" referrerpolicy="no-referrer" />
    <title>Document</title>
</head>
<body>
    {% block content %}
    {% endblock %}

    <script src="https://code.jquery.com/jquery-3.6.0.min.js" integrity="sha256-/xUj+3OJU5yExlq6GSYGSHk7tPXikynS7ogEvDej/m4=" crossorigin="anonymous"></script>
    <script src="https://code.jquery.com/ui/1.13.1/jquery-ui.min.js" integrity="sha256-eTyxS0rkjpLEo16uXTS0uVCS4815lc40K2iVpWDvdSY=" crossorigin="anonymous"></script>
    <script>
        const formTestURL = "{% url 'app:form_test' %}";
        const csrftoken = '{{ csrf_token }}';
    </script>
    <script src="{% static 'js/main.js' %}"></script>
</body>
</html>
Add the accompanying code to Home.html.
Note that the second line loads widget_tweaks.
If you do not load this, the appropriate class will not be applied to the form later.
Now a super simple button are implemented in the template. Currently, only buttons have been created, so let's create a form and view to display the modal.
home.html
{% extends "base.html" %}
{% load  widget_tweaks %}
{% block content %}
    <section class="button">
        <div class="button__title">jQueryUI modal</div>
        <div class="button__area">
            <button id="button__click" class="button__click">Click!</button>
        </div>

        <div id="click__modal" style="display:none;">
        </div>

    </section>
{% endblock %}
5. Creating forms.py
It would be easier to use ModelForm, but for this application, I used a normal form.
Create a file named forms.py in the application folder and enter the following code.
from django import forms

class NumberForm(forms.Form):
    username = forms.CharField(label="username", required=True, max_length=10)
    number = forms.IntegerField(label="number", required=True)
6. Creating a basic views.py
I will write a simple view to display the form in views.py.
views.py
from django.views.generic import FormView
from app.forms import NumberForm

class NumberFormView(FormView):
    template_name = "app/home.html"
    form_class = NumberForm
7. Adding new application to urls.py of Project
Next, add the following code to your project's urls.py file.
urls.py
from django.contrib import admin
from django.urls import path, include

urlpatterns = [
    ...
    path('', include('app.urls', namespace='app'))
]
8. Adding a View to urls.py on the Application
Next, create urls.py on the application side and add a path corresponding to the newly created view.
app/urls.py
from django.urls import path
from app import views

app_name = 'app'

urlpatterns = [
    path('', views.NumberFormView.as_view(), name='modal'),
]
Currently, if you access http://localhost:8000/, you'll see the following:
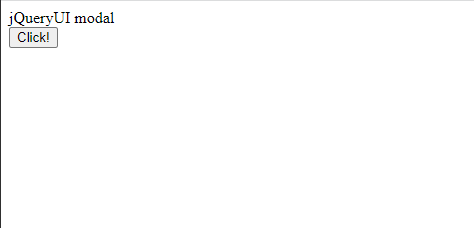
Let's dive right into creating a modal with jQueryUI. However, the current HTML design is too simple, so let's write some CSS code to enhance it before adding the modal.
custom-style.css
*{
    padding:0;
    margin:0;
    box-sizing:border-box;
}

.button{
    width: 100vw;
    height: auto;

    display: flex;
    flex-direction: column;
}

.button__title{
    width: auto;
    margin: 2rem;

    display: flex;
    justify-content: center;
    align-items: center;
}

.button__area{
    width: auto;
    margin: 2rem;

    display: flex;
    justify-content: center;
    align-items: center;
}

.button__click{
    width: 4rem;
    height: 2rem;
}
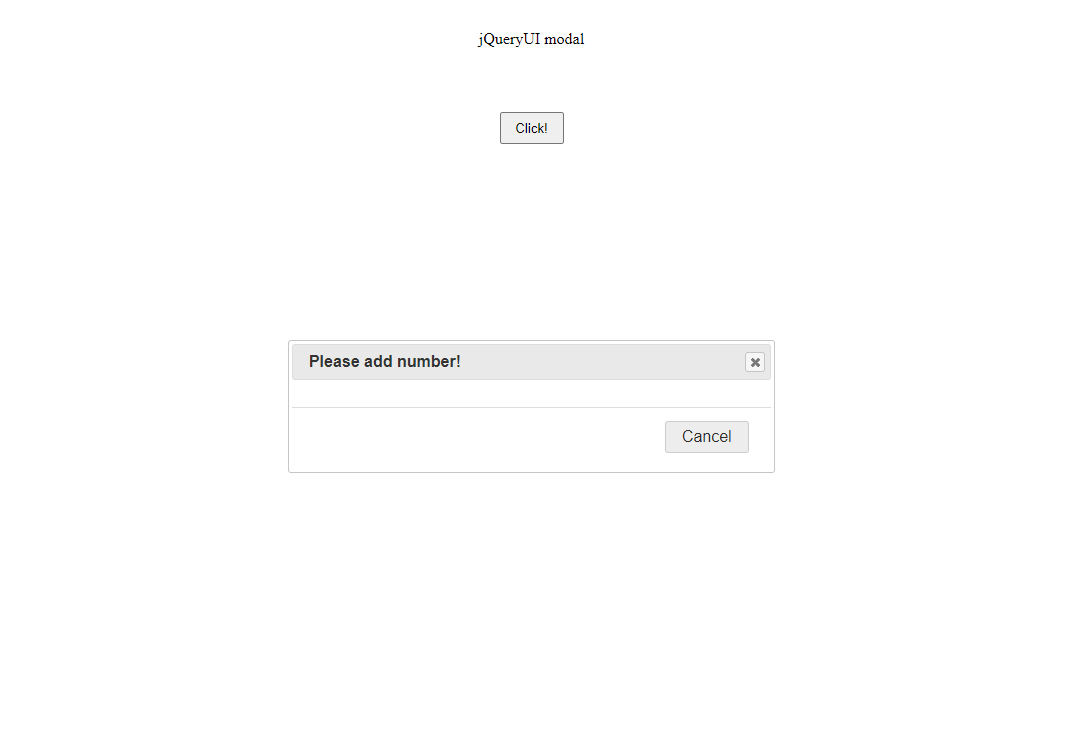
9. Adding Basic jQueryUI Code to the Template
Let's add a modal to main.js using jQueryUI.
As previously stated, this file extension is HTML, but it functions similarly to a JS file.
Please add the accompanying code:
static\js\main.js
$(function() {
    $("#button__click").on("click", function() {
        $("#click__modal").dialog({
                modal: true,
                height: "auto",
                width: "30vw",
                title: "Please add number!",
                buttons: {
                    // "Add Number": ,
                    "Cancel": function () {
                        $(this).dialog("close");
                    }
                }
            }
        )
    });
});
jQuery UI makes modal implementation remarkably straightforward.
10. Implement AJAX to enable data communication between the view and the jQueryUI component
To display the form within the modal, you'll need to add the following code. First, add this to your views.py file:
views.py
from django.shortcuts import render
...

...

def form_test(request, *args, **kwargs):
    form = NumberForm()

    context = {
        'form':form
    }

    return render(request, 'app/home.html', context)
Add the following code to your application-level urls.py file.
app/urls.py
from django.urls import path
from app import views

app_name = 'app'

urlpatterns = [
    ...
    path('form/', views.form_test, name='form_test'),
]
Then add the code to home.html.
app/home.html
{% extends "base.html" %}
{% load  widget_tweaks %}
{% block content %}
    <section class="click">
        ...
        <div id="click__modal" style="display:none;">
            <form id="click__confirm" class="click__confirm" autocomplete="off" action="{% url 'app:form_test' %}" method="POST">
               {% csrf_token %}
                <div class="click__label">username</div>
               {% render_field form.username class="form_field"%}
                <div class="click__label">number</div>
               {% render_field form.number class="form_field"%}
            </form>
        <div id="message" class="success_message"></div>
        </div>
    </section>
{% endblock %}
Replace the following code in main.js.
A common mistake is to forget to include the csrftoken in the data property when sending data via Ajax. Sending data without the csrftoken will result in an error.
static\js\main.js
 $(function() {
    $("#button__click").on("click", function(e) {
        e.preventDefault();
        $("#click__modal").dialog({
                modal: true,
                height: "auto",
                width: "30vw",
                title: "Please add number!",
                buttons: {
                    "Add Number": addNumber, //Be careful here!
                    "Cancel": function () {
                        $(this).dialog("close");
                    }
                }
            }
        )
    });
});

  function addNumber(){
            $.ajax({
                type: 'POST',
                url: formTestURL,
                data:{
                    csrfmiddlewaretoken:csrftoken,
                    username:$('#id_username').val(),
                    number:$('#id_number').val(),
                },
            success: function(data){
                    console.log(data)
                },
            error: function(error){
                console.log(error)
            },
            })
    }
11. Applying Data Validation Within the View
To validate the form data submitted by the user, add the following code to your view.
This code checks if the request is an Ajax request, performs form validation, and if valid, saves the form to the database.
views.py
from django.http import JsonResponse
from app.models import Number

...

def form_test(request, *args, **kwargs):
    is_ajax = request.headers.get('X-Requested-With') == 'XMLHttpRequest'
    form = NumberForm()
    data = {}
    if is_ajax:
        form = NumberForm(request.POST)
        if form.is_valid():
            data['username'] = form.cleaned_data.get('username')
            data['number'] = form.cleaned_data.get('number')
            data['status'] = 'ok'
            new_number = Number(
                username=data['username'],
                number = data['number']
            )
            new_number.save()
            return JsonResponse(data)
        else:
            data['status'] = 'error'
            return JsonResponse(data)
    context = {
        'form':form
    }
    return render(request, 'app/home.html', context)
12. Displaying a Success Message upon Successful Data Storage
Now that we've implemented the view, let's handle the AJAX success and error responses.
static\js\main.js
    ...

  function addNumber(){
            $.ajax({
                type: 'POST',
                url: formTestURL,
                data:{
                    csrfmiddlewaretoken:csrftoken,
                    username:$('#id_username').val(),
                    number:$('#id_number').val(),
                },
            success: function(data){

                    if(data['status']==="error"){
                     $('#message').text('Error!');
                        return false
                    }

                    $('#id_username').val("")
                    $('#id_number').val("")
                    $('#message').text('Success!');
                },
            error: function(error){
                console.log(error)
            },
            })
    }
The above code allows you to submit a form and its content. After submitting, the form values are cleaned up.
When the "Success!" message appears, the implementation is complete!

Changing CSS
The default design looks a bit outdated. Let's adapt the CSS to match this blog's design to show that customizing jQueryUI is easy.
I'll cover CSS customization in Part 2, as this article is already quite long.
GitHub Repository
The complete project is available on GitHub in the jqueryui_modal repository; I hope it proves useful in your work.