
Note: On wide screens, code blocks may appear beside the explanatory text; on narrower screens (tablet/mobile) they appear below. Instructions like “add the code” refer to the adjacent code block regardless of placement.
The SPA Dilemma: Django vs. JavaScript Frameworks
In the world of web development, building rich, interactive applications using JavaScript frameworks like React or Vue has become increasingly common. Many new projects start by choosing a front-end framework. Developers accustomed to these frameworks might find Django feels somewhat old-fashioned. However, for those of us who've been using Django since before the rise of modern JavaScript, learning React, Vue, or Angular from scratch can feel like a tedious hurdle.
If you're one such developer, you might wonder if a full front-end framework is really necessary to build an SPA. Yes—you can stitch together Django templates with CSS, vanilla JavaScript, and AJAX to make it work, but the codebase tends to become complex and hard to maintain as interactions grow.
Instead of layering ad‑hoc scripts, HTMX lets you express interactivity declaratively in your HTML while keeping your Django project cohesive and well-structured. For many Django apps, it’s the cleanest, most maintainable path to SPA‑like behavior—without adopting a heavy framework.
HTMX is gaining popularity among Django developers as a tool for creating SPA-like experiences without adopting a full JavaScript framework. Essentially, HTMX acts as a drop-in replacement for AJAX, allowing you to build dynamic and interactive interfaces while working primarily in Django. This empowers you to deliver modern web experiences to users without the complexities of newer frameworks.
In this post, I'll show you how to use Django, HTMX, and Hyperscript to create a modal window—a common component in modern web applications. This combination can help you enhance your Django projects without needing to write complex JavaScript code or dive into a full front-end framework. Let's get started!
Introducing HTMX
HTMX is a JavaScript library that allows you to handle dynamic events and asynchronous communication simply by adding attributes to your HTML, without writing JavaScript. Unlike traditional AJAX, which returns JSON data, HTMX handles asynchronous server communication by returning HTML itself. This means you can directly update portions of your page with server-rendered HTML. This approach empowers developers to deliver the interactive functionality users expect from modern web applications while maintaining a cleaner and more understandable codebase.
Application Overview
Here's how the application works:
1. Clicking the button on the home page displays a modal window.
2. Enter your email address and comment in the modal window, and then click the "Submit" button. This sends the data to the backend. After the backend validates the data, it's saved to the database and simultaneously displayed in the list on the home page.
Note that this application focuses on creating a modal using HTMX, so email validation is minimal. The comment input field has a character count. The view handles character count validation.
Development Process
The application is implemented in the following sequence:
- Setting up the Django Project
- Integrating Hyperscript with HTMX and base.html
- Defining the Data Model (models.py) 4. Creating the Django Form (forms.py)
- Registering Models in the Admin Interface (admin.py)
- Implementing the HomeView (views.py)
- Designing the Home Page Template (home.html)
- Configuring URL Routing (urls.py) 9. Creating the Modal View (views.py)
- Designing the Modal Template (modal.html)
- Creating the Comment List Template (comment-list.html) and Updating home.html 12. Styling the Modal with CSS
Django packages
The following packages are used in this project:
While there's a package called django-htmx that provides additional HTMX integration features for Django, we won't be using it in this tutorial.
Django
psycopg2-binary
django-environ
django-widget-tweaks
1. Setting up the Django Project
To get started, set up Django as usual. If you're using Docker, follow the setup instructions in this article.
After completing the basic setup, create your first application and a template view. Then, display "Hello world". If you're following the "Basic setup for running Django with Docker" tutorial, proceed to step 9 where you add minimal code to display 'Hello World'.
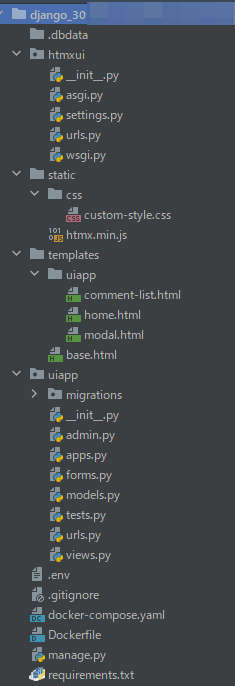
Here's the file structure for this project: The project name is htmxui, and the app name is uiapp. Note that .dbdata folder won't be generated if you're not using Docker.
Now, we'll use django-widget-tweaks for this application. Add widget_tweaks to INSTALLED_APPS in settings.py:
uiapp/settings.py
INSTALLED_APPS = [
    ...
    'widget_tweaks',
    ...
]
2. Integrating Hyperscript with HTMX and base.html
To set up HTMX and Hyperscript, create a static folder and place the HTMX code into it. Although HTMX can be implemented with a CDN, this approach raises security concerns. Therefore, we'll include the actual code directly in the project.
You can download the HTMX code from this URL. However, before placing the code in the static folder, you need to add the static file configuration to settings.py. Add the code shown here to settings.py:
uiapp/settings.py
STATIC_URL = '/static/'
 # add
STATICFILES_DIRS = [
    os.path.join(BASE_DIR, "static"),
]
Next, create a static folder at the root of your project and add a file named htmx.min.js.
Then paste the HTMX code obtained from the above site into htmx.min.js.
Afterwards, open base.html and add the path to the HTMX script and the hyperscript CDN.
templates/base.html
{% load static %}
<!doctype html>
<html lang="en">
<head>
    <meta charset="UTF-8">
    <meta name="viewport"
          content="width=device-width, user-scalable=no, initial-scale=1.0, maximum-scale=1.0, minimum-scale=1.0">
    <meta http-equiv="X-UA-Compatible" content="ie=edge">

    <link rel="stylesheet" href="{% static 'css/custom-style.css' %}"/>
    <title>Document</title>
</head>
    <body>
        <section class="site-root">
            {% block contents %}
            {% endblock %}
        </section>
    <script src="{% static 'htmx.min.js' %}" defer/>
    <script src="https://unpkg.com/[email protected]"></script>
    </body>
</html>
3.Defining the Data Model (models.py)
In this section, we will create the basic models for the application.
We'll use three fields: EmailField, TextField, and DatetimeField. Add the code shown here:
Don't forget to run makemigrations and migrate here.
models.py
from django.db import models

class Comment(models.Model):
    email = models.EmailField(max_length=70)
    comment = models.TextField(max_length=10)
    created_at = models.DateTimeField(auto_now_add=True)

    def __str__(self):
        return 'ID: {}'.format(self.id)
4.Creating the Django Form (forms.py)
Create forms.py and add the code shown here:
uiapp/forms.py
from django import forms
from uiapp.models import Comment

class CommentForm(forms.ModelForm):
    class Meta:
        model=Comment
        fields = ['email', 'comment']

        widgets = {
            'comment': forms.Textarea(attrs={'rows':4, 'cols':15}),
        }
5. Registering Models in the Admin Interface (admin.py)
Create admin.py and add the code shown here:
uiapp/admin.py
from django.contrib import admin
from uiapp.models import Comment

class CommentAdmin(admin.ModelAdmin):
    list_display = ('id', 'email')

admin.site.register(Comment, CommentAdmin)
6. Implementing the HomeView (views.py)
To create the actual home page, you need to create a HomeView. Add the code shown here:
uiapp/views.py
from django.views.generic import ListView
from htmx_app.models import Comment

class HomeView(ListView):
    template_name = 'uiapp/home.html'
    model = Comment
7. Designing the Home Page Template (home.html)
Create a template that corresponds to the `HomeView` described above.
To do so, create a template folder at the project's root and create each file with the following structure.
Add the code shown here to home.html.
uiapp/home.html
{% extends 'base.html' %}
{% block contents %}
<main class="main">
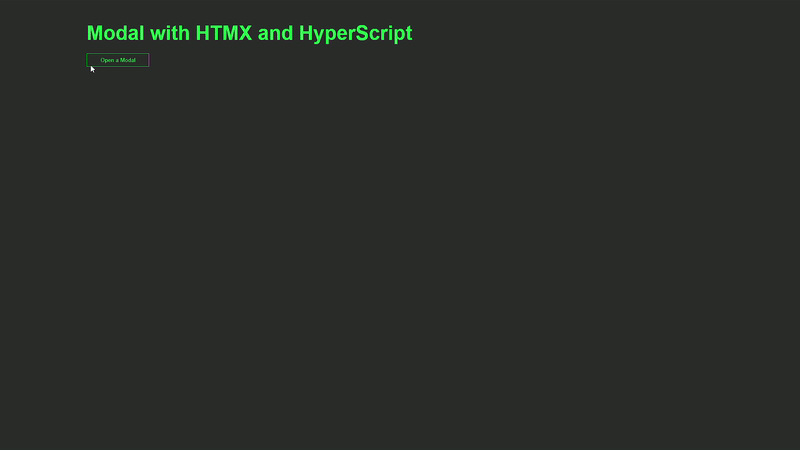
<h1>Modal with HTMX and HyperScript</h1>
<div class="main__button">
<button hx-get="{% url 'uiapp:display-modal' %}" hx-target="body" hx-swap="beforeend" class="main__open-button">Open a Modal</button>
</div>
</main>
{% endblock %}
In the button code shown here (to the right on wide screens, below on smaller screens), the HTMX attributes are:
The hx-get attribute makes an asynchronous request to the display-modal view. The result of this request is returned in the body of the HTML document, just before the end of the body element.
<button hx-get="{% url 'uiapp:display-modal' %}" hx-target="body" hx-swap="beforeend" class="main__open-button">Open a Modal</button>
8. Configuring URL Routing (urls.py)
In this application, the URL pattern is divided into two parts: urlpatterns and htmx_urlpatterns.
While you could keep all URLs together, separating the views used in HTMX from the regular views makes the code more organized.
uiapp/urls.py
from django.urls import path
from htmx_app.views import HomeView, modal delete_comment

app_name = 'uiapp'

urlpatterns = [
    path('', HomeView.as_view(), name="home"),
]

htmx_urlpatterns = [
    path('modal/', modal, name="display-modal"),
]

urlpatterns += htmx_urlpatterns
9. Creating the Modal View (views.py)
Let's add the following code to views.py.
uiapp/views.py
from django.shortcuts import render

def modal(request):
    return render(request, 'uiapp/modal.html')
10. Designing the Modal Template (modal.html)
Let's create a modal.html file.
This code includes a section that uses htmx and another section that uses hyperscript. Additionally, a hyperscript CDN is added at the end of the code.
It's hard to understand when htmx and hyperscript are mixed, so I'll explain each separately.
templates/uiapp/modal.html
{% load widget_tweaks %}

<div id="modal" _="on closeModal add .closing then wait for animationend then remove me">
    <div class="modal-underlay" _="on click trigger closeModal"></div>
    <div class="modal-content">
        <h1>Modal Dialog</h1>
        <form method="POST" action="{% url 'uiapp:display-modal' %}" class="dialog">
            {% csrf_token %}
            <div id="email-error"></div>
            <label>{{ form.email.label_tag }}</label>
            {% render_field form.email class="form__email" %}
            <label>{{ form.comment.label_tag }}</label>
            {% render_field form.comment hx-post="/check_comment/" hx-swap="outerHTML"  hx-trigger="keyup" hx-target="#modal_field" class="form__comment" %}
             <div id="modal_field">Count:</div>
            <div class="form__button">
                <input type="button" value="Cancel" _="on click trigger closeModal"></input>
                <input type="button" value="Submit" hx-post="{% url 'uiapp:display-modal' %}" hx-trigger="click" hx-target="#email-error" hx-swap="innerHTML"></input>
            </div>
        </form>
    </div>
</div>

<script src="https://unpkg.com/[email protected]"></script>
10-1. Hyperscript
The most notable part of this code is the underscore () syntax. This underscore syntax is hyperscript notation.
For example, look at the Cancel button and the id="modal" tag at the top:*
_="on click trigger closeModal"
This code means that when the Cancel button is clicked, an event called "closeModal" is triggered.
Then, when the closeModal event is triggered, the class .closing is added because the closeModal event is being listened to in the following HTML tag.
After that, the modal is removed after the CSS animation is completed.
Writing this in JavaScript would be quite a painstaking task, but surprisingly, hyperscript can be written quickly as if it were handling natural language.
<div id="modal" _="on closeModal add .closing then wait for animationend then remove me">
...
10-2. htmx
Let's examine this HTMX code:
{% render_field form.comment hx-post="/check_comment/" hx-swap="outerHTML" hx-trigger="keyup" hx-target="#modal_field" class="form__comment" %}
The code above has the following meaning:
hx-trigger="keyup": This triggers the event each time a key is pressed and released.hx-post="/check_comment/": This sends data via POST to thecheck_commentview.hx-target="#modal_field": This targets the#modal_field.hx-swap="outerHTML": This replaces the entire specified HTML.
To add the CSS related to the modal, create static/css/custom-style.css and add the code shown here.
(This CSS code is partly based on the code in the official htmx document.)
static/css/custom-style.css
/*************
MODAL DIALOG and FORM
**************/
*{
    padding:0;
    margin:0;
    box-sizing:border-box;
}

:root{
    --main-font-family:'Roboto Condensed', sans-serif;
    --main-bg-color:#262626;
    --main-color:#1FC742;
}

body{
    position: absolute;
    max-width: 100%;
    top: 0;
    bottom: 0;
    overflow-x: hidden;

    font-family: var(--main-font-family);
    background-color: var(--main-bg-color);
    color: var(--main-color);
    border-color:var(--main-color);
    line-height: 1.5;
}

a, u {
    text-decoration: none;
    color: var(--main-color);
}

h1{
    font-size: 3rem;
    line-height: 4rem;
}

.site-root{
    display: grid;
    grid-template-columns: 10vw 80vw 10vw;
    grid-template-areas: "left main right";
}

/*************
Main part
**************/

.main{
    grid-area:main;
    padding: 3rem 1rem;

    display: grid;
    grid-auto-rows: auto;
    grid-gap:1rem
}

/*************
modal
**************/

#modal {
    position: fixed;
    top:0;
    bottom: 0;
    left:0;
    right:0;
    background-color:rgba(0,0,0,0.5);
    z-index:1000;

    display:flex;
    flex-direction:column;
    align-items:center;

    animation-name: fadeIn;
    animation-duration:150ms;
    animation-timing-function: ease;
}

#modal > .modal-underlay {

    position: absolute;
    z-index: -1;
    top:0;
    bottom:0;
    left: 0;
    right: 0;
}

#modal > .modal-content {
    margin-top:10vh;
    width:80%;
    max-width:600px;

    border:solid 1px var(--main-color);
    border-radius:8px;
    box-shadow: 0px 0px 20px 0px rgba(0,0,0,0.3);
    background-color: var(--main-bg-color);
    padding:20px;

    animation-name:zoomIn;
    animation-duration:150ms;
    animation-timing-function: ease;
}

#modal.closing {
    animation-name: fadeOut;
    animation-duration:150ms;
    animation-timing-function: ease;
}

#modal.closing > .modal-content {
    animation-name: zoomOut;
    animation-duration:150ms;
    animation-timing-function: ease;
}

@keyframes fadeIn {
    0% {opacity: 0;}
    100% {opacity: 1;}
}

@keyframes fadeOut {
    0% {opacity: 1;}
    100% {opacity: 0;}
}

@keyframes zoomIn {
    0% {transform: scale(0.9);}
    100% {transform: scale(1);}
}

@keyframes zoomOut {
    0% {transform: scale(1);}
    100% {transform: scale(0.9);}
}
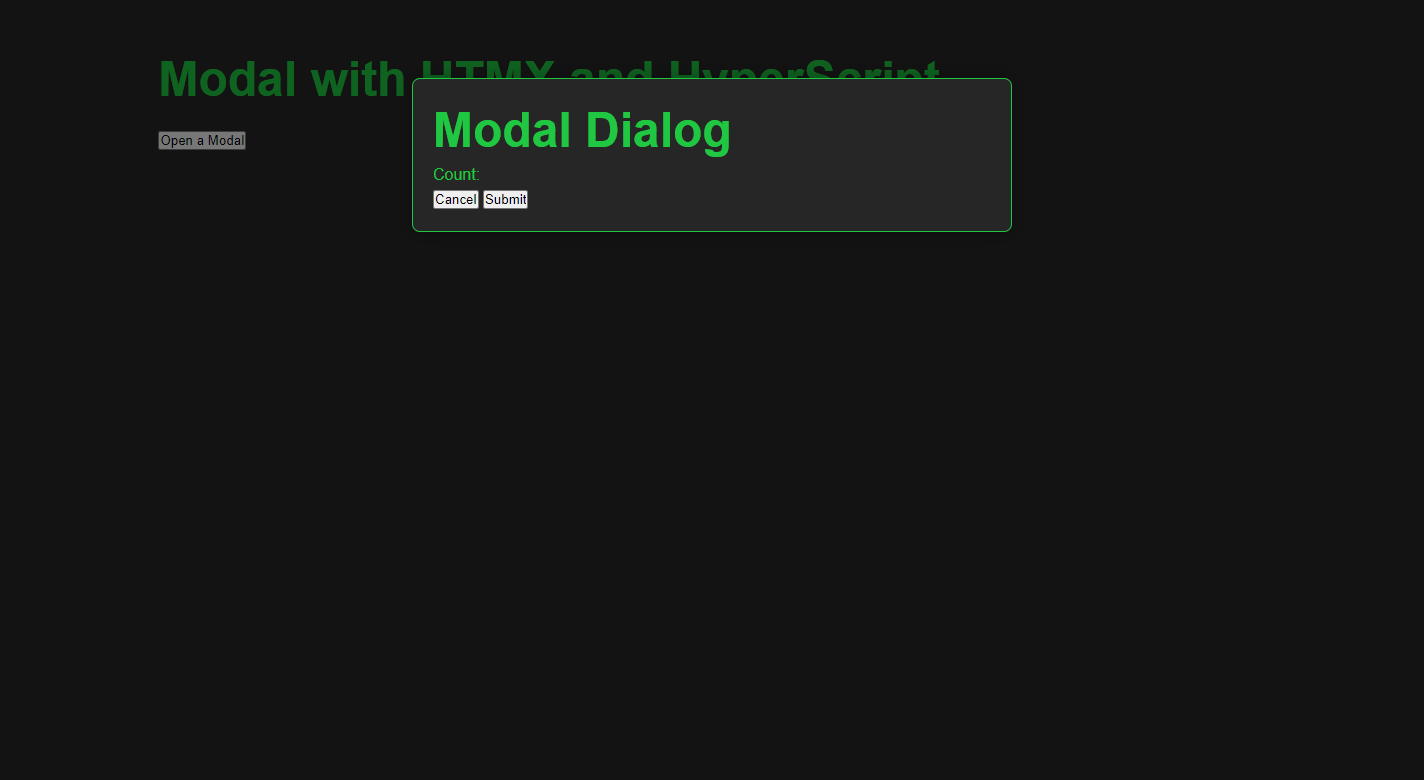
The current screen of this app is shown below:
10-3. Creating View
Now that the frontend is complete, let's create the backend views.
We'll create two view functions. The first handles the POST request from the modal form.
The second checks the character count in the comment entered in the modal form.
First, add the code shown here to the modal view we created earlier.
uiapp/views.py
...
from django.http import HttpResponse
from htmx_app.forms import CommentForm
...

def modal(request):
    #  ↓↓↓ add
    form = CommentForm()
    if request.method == 'POST':
        form=CommentForm(request.POST)
        if form.is_valid():
            form.save()
            html = "<div id='email-error' _='on load wait 1s trigger closeModal'>Success</div>"
            return HttpResponse(html, headers={'HX-Trigger': 'newList'})
        return HttpResponse('no')
    # ↑↑↑ add
    return render(request, 'uiapp/modal.html', {'form':form}) #add
The check_comment view validates the comment length.
If the input contains more than ten characters, HTML displaying an error message is returned. If it contains ten or fewer characters, HTML that includes the character count is returned.
uiapp/views.py
...

def check_comment(request):
    comment = request.POST.get('comment')
    comment_number = len(comment)
    if comment_number > 9:
        html = "<div id='modal_field' class='comment_error'>Count:<span id='comment-error'>The number of characters is the limit. %s</span></div>" % comment_number
        return HttpResponse(html)
    else:
        html = "<div id='modal_field'>Count:<span id='comment-error'>%s</span></div>" % comment_number
        return HttpResponse(html)
Add the corresponding URLs in urls.py for the above view.
uiapp/urls.py
...
from uiapp.views import HomeView, modal, check_comment

...

htmx_urlpatterns = [
    ...
    path('check_comment/', check_comment, name='check-comment'),
]

...
11. Creating the Comment List Template (comment-list.html) and Updating home.html
To display the data entered in the modal window, create a template called comment-list.html in the templates/uiapp folder.
After creating the file, add the following code to it.
uiapp/comment-list.html
{% extends 'base.html' %}

<div id="list" class="list" hx-get="{% url 'uiapp:list-comment' %}" hx-trigger="newList delay:2s from:body">
</div>
Recall the headers={'HX-Trigger': 'newList'} code from the modal view.
The newList trigger is activated here. This code means that when it receives headers={'HX-Trigger': 'newList'}, it will send a get request to uiapp:list-comment after 2 seconds.
Next, create the list_comment view.
This view simply retrieves all the data from the model.
uiapp/views.py
...

def list_comment(request):
    lists =  Comment.objects.all()

    context = {
        'lists':lists
    }

    return render(request, 'uiapp/comment-list.html', context)
Once the view implementation is complete, add the code shown here to urls.py on the application side.
uiapp/urls.py
...
from uiapp.views import HomeView, modal, check_comment, list_comment

...

htmx_urlpatterns = [
    ...
    path('list_comment/', list_comment, name='list-comment'),
    ...
]

...
Add the new attributes to the HomeView you created earlier as follows.
uiapp/views.py
...

class HomeView(ListView):
    template_name = 'uiapp/home.html'
    model = Comment
    context_object_name = "lists" #add
    ordering = '-id' #add

...
Add the following code to comment-list.html.
uiapp/comment-list.html
<div id="list" class="list" hx-get="{% url 'uiapp:list-comment' %}" hx-trigger="newList delay:2s from:body">
    <!-- ↓↓↓ add  -->
    {% for list in lists|dictsortreversed:"id" %}
    <div class="list__item">
           <span class="list__email">{{ list.email }}</span>
           <span class="list__comment">{{ list.comment }}</span>
           <input type="button"
                  value="Delete"
                  hx-headers='{"X-CSRFToken": "{{ csrf_token }}"}'
                  hx-post="{% url 'uiapp:delete-comment' pk=list.id %}"
                  hx-trigger="click"
                  hx-target="#list"
                  hx-swap="outerHTML"
                  class="list__button"
           ></input>
    </div>
    {% endfor %}
    <!-- ↑↑↑ add  -->
</div>
This code displays a list of items while also adding a delete button for each item in the list.
HTMX is used to implement the delete functionality.
While the HTMX code has many attributes, the key one to focus on is hx-post. Each item has an ID, and hx-post calls the view corresponding to this ID.
The view deletes the data for the specified ID. Finally, the HTML tag returned from the view side replaces the #list part set in hx-target.
Now, let's go back to the view and create the delete_comment view.
uiapp/views.py
...
from django.shortcuts import render, get_object_or_404
...

def delete_comment(request, pk):

    list_item = get_object_or_404(Comment, pk=pk)

    if request.method == "POST":
        list_item.delete()
    lists = Comment.objects.all()

    context = {
        'lists':lists
    }

    return render(request, 'uiapp/comment-list.html', context)
The corresponding URL for this view is:
uiapp/urls.py
...
from uiapp.views import HomeView, modal, check_comment, list_comment, delete_comment

...

htmx_urlpatterns = [
    ...
    path('delete_comment/<int:pk>/', delete_comment, name='delete-comment')
]

...
Finally, add an include tag to home.html so that this list appears on the home screen.
That's it! We have now implemented the same functionality as shown in the GIF animation at the beginning of this article.
templates/uiapp/home.html
{% extends 'base.html' %}

{% block contents %}

    <main class="main">
        <h1>Modal with HTMX and HyperScript</h1>
        <div class="main__button">
            <button hx-get="{% url 'uiapp:display-modal' %}" hx-target="body" hx-swap="beforeend" class="main__open-button">Open a Modal</button>
        </div>
        <!-- Add -->
        {% include 'uiapp/comment-list.html' %}
    </main>

{% endblock %}
12. Styling the Modal with CSS
If you want to achieve the same design as shown in the video at the beginning of the article, add the CSS shown here.
This CSS is created using the grid layout. Please note that the CSS for the modal that we previously added is also included. (Please add only the parts that show "Please Add~.")
*{
    padding:0;
    margin:0;
    box-sizing:border-box;
}

:root{
    --main-font-family:'Roboto Condensed', sans-serif;
    --main-bg-color:#262626;
    --main-color:#1FC742;
}

body{
    position: absolute;
    max-width: 100%;
    top: 0;
    bottom: 0;
    overflow-x: hidden;

    font-family: var(--main-font-family);
    background-color: var(--main-bg-color);
    color: var(--main-color);
    border-color:var(--main-color);
    line-height: 1.5;
}

a, u {
    text-decoration: none;
    color: var(--main-color);
}

h1{
    font-size: 3rem;
    line-height: 4rem;
}

.site-root{
    display: grid;
    grid-template-columns: 10vw 80vw 10vw;
    grid-template-areas: "left main right";
}

/*************
Main part
**************/

.main{
    grid-area:main;
    padding: 3rem 1rem;

    display: grid;
    grid-auto-rows: auto;
    grid-gap:1rem
}

/**************************
Please Add from here to "MODAL DIALOG and FORM".
***************************/

.main__button{
    display: grid;
    grid-template-columns: repeat(10, 1fr);
    grid-template-rows: 2rem;
}

.main__open-button {
    border: 1px solid var(--main-color);
    color: var(--main-color);
    background-color: var(--main-bg-color);
}

.main__open-button:hover {
    cursor: pointer;
    border: 1px solid var(--main-color);
    color: var(--main-bg-color);
    background-color: var(--main-color);
}

/*************
MODAL DIALOG and FORM
**************/

#modal {
    /* Underlay covers entire screen. */
    position: fixed;
    top:0px;
    bottom: 0px;
    left:0px;
    right:0px;
    background-color:rgba(0,0,0,0.5);
    z-index:1000;

    /* Flexbox centers the .modal-content vertically and horizontally */
    display:flex;
    flex-direction:column;
    align-items:center;

    /* Animate when opening */
    animation-name: fadeIn;
    animation-duration:150ms;
    animation-timing-function: ease;
}

#modal > .modal-underlay {
    /* underlay takes up the entire viewport. This is only
    required if you want to click to dismiss the popup */
    position: absolute;
    z-index: -1;
    top:0px;
    bottom:0px;
    left: 0px;
    right: 0px;
}

#modal > .modal-content {
    /* Position visible dialog near the top of the window */
    margin-top:10vh;

    /* Sizing for visible dialog */
    width:80%;
    max-width:600px;

    /* Display properties for visible dialog*/
    border:solid 1px var(--main-color);
    border-radius:8px;
    box-shadow: 0px 0px 20px 0px rgba(0,0,0,0.3);
    background-color: var(--main-bg-color);
    padding:20px;

    /* Animate when opening */
    animation-name:zoomIn;
    animation-duration:150ms;
    animation-timing-function: ease;
}

#modal.closing {
    /* Animate when closing */
    animation-name: fadeOut;
    animation-duration:150ms;
    animation-timing-function: ease;
}

#modal.closing > .modal-content {
    /* Aniate when closing */
    animation-name: zoomOut;
    animation-duration:150ms;
    animation-timing-function: ease;
}

@keyframes fadeIn {
    0% {opacity: 0;}
    100% {opacity: 1;}
}

@keyframes fadeOut {
    0% {opacity: 1;}
    100% {opacity: 0;}
}

@keyframes zoomIn {
    0% {transform: scale(0.9);}
    100% {transform: scale(1);}
}

@keyframes zoomOut {
    0% {transform: scale(1);}
    100% {transform: scale(0.9);}
}

/**************************
Please add below from here.
***************************/

/*************
List part
**************/
.list{
    display: grid;
    grid-gap:1rem
}

.list__item {
    height: 4rem;
    display: grid;
    grid-template-columns: repeat(10, 1fr);
    justify-content: flex-start;
    align-items: center;
    border: 1px solid;
    border-radius: 1rem;
    padding: 1rem;
}

.list__button{
    height: 2rem;
    border: 1px solid var(--main-color);
    color: var(--main-color);
    background-color: var(--main-bg-color);
}

.list__button:hover{
    cursor: pointer;
    border: 1px solid var(--main-color);
    color: var(--main-bg-color);
    background-color: var(--main-color);
}

/************
Form part
 ************/

.dialog{
    display: grid;
    grid-auto-columns: auto;
    grid-auto-rows:auto;
    grid-gap: 0.5rem;
}

.form__button{
    width: auto;
    height: 2rem;
    display: grid;
    grid-template-columns: 1fr 1fr;
    grid-gap: 1rem;
}

.form__button input{
    border: 1px solid var(--main-color);
    color: var(--main-color);
    background-color: var(--main-bg-color);
}

.form__button input:hover{
    cursor: pointer;
    border: 1px solid var(--main-color);
    color: var(--main-bg-color);
    background-color: var(--main-color);
}

.form__email{
    height: 2rem;
    padding: 0 0.5rem;
    background-color: var(--main-bg-color);
    color:var(--main-color);
    border: 1px solid var(--main-color);
}

.form__email:focus{
    background-color: var(--main-bg-color);
    outline: none;
    border: 2px solid var(--main-color);
}

.form__comment{
    height: 8rem;
    padding: 0.5rem;
    color: var(--main-color);
    background-color: var(--main-bg-color);
    border: 1px solid var(--main-color);
}

.form__comment:focus{
    outline: none;
    border: 2px solid var(--main-color);
}

.comment_error{
    color: red;
}
Conclusion
This tutorial has been fairly lengthy, but it only scratches the surface of what’s possible with HTMX. As you’ve seen, HTMX makes dynamic updates in Django—like the modal we built—without much JavaScript.
I encourage you to explore the official documentation and try other components (dynamic forms, live search) to deepen your understanding.
The GitHub repository for this project is available here: https://github.com/DevWoody856/htmx_01 — Happy coding!